Case Kali ini kita akan install Ulang OS Windows 8 menjadi Windows 2010 pada VPS Natanetwork, Namun Cara ini juga dapat dipakai pada VM CloudAja
1. Login Portal Natanetwork Melalui Url Berikut.
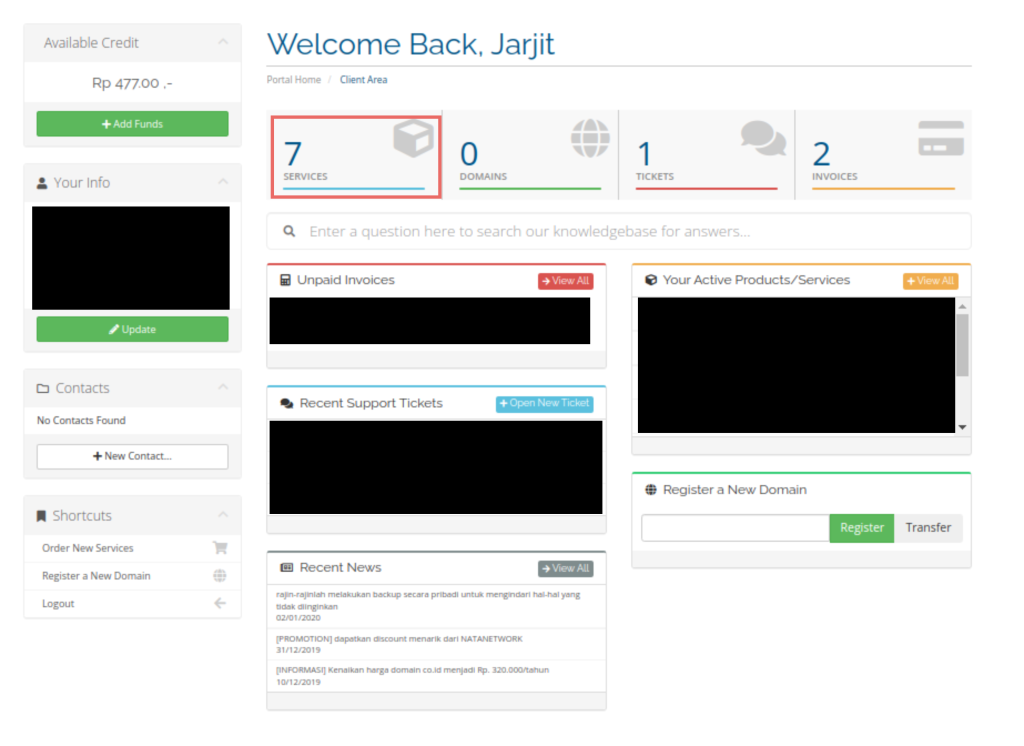
2. Masuk Menu Service untuk memilih VPS yang akan di install ulang.
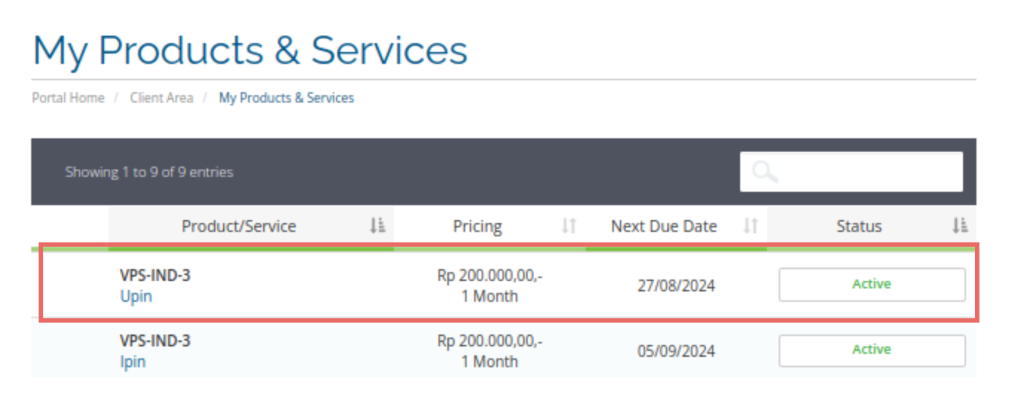
3. Masuk kedalam Manage Product VPS yang akan di Install Ulang
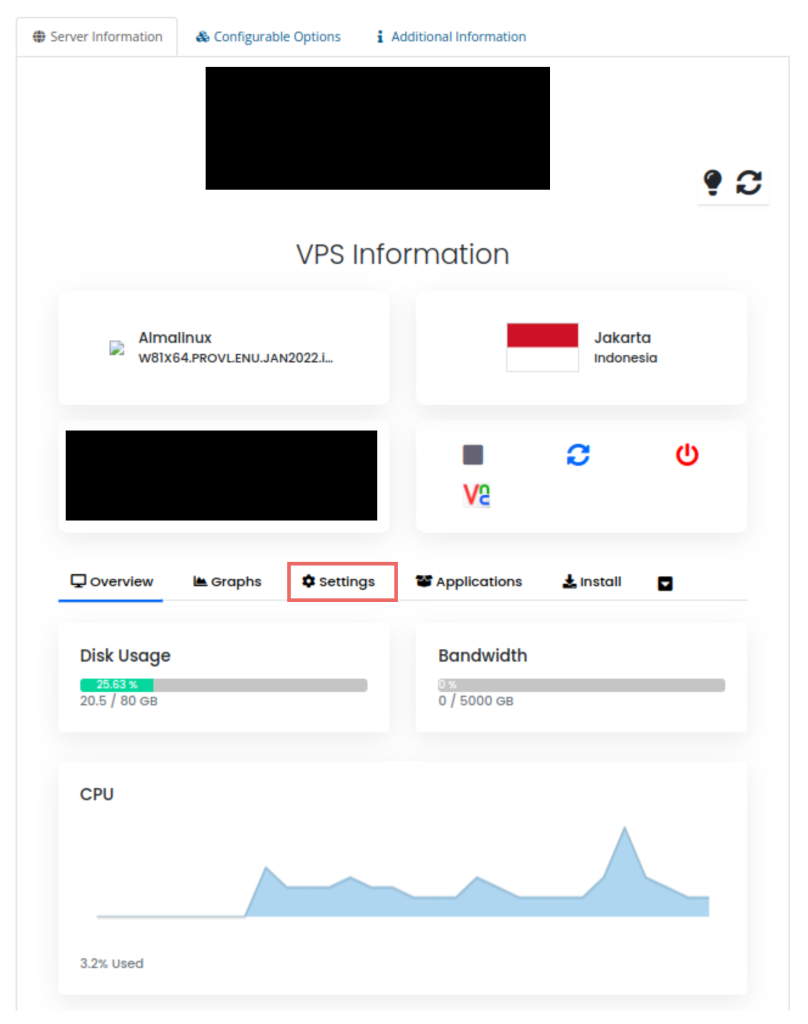
4. Pada Server Information pilih Setting
5. Pada Menu Setting, Pilih VPS Configuration dan Pilih Select ISO
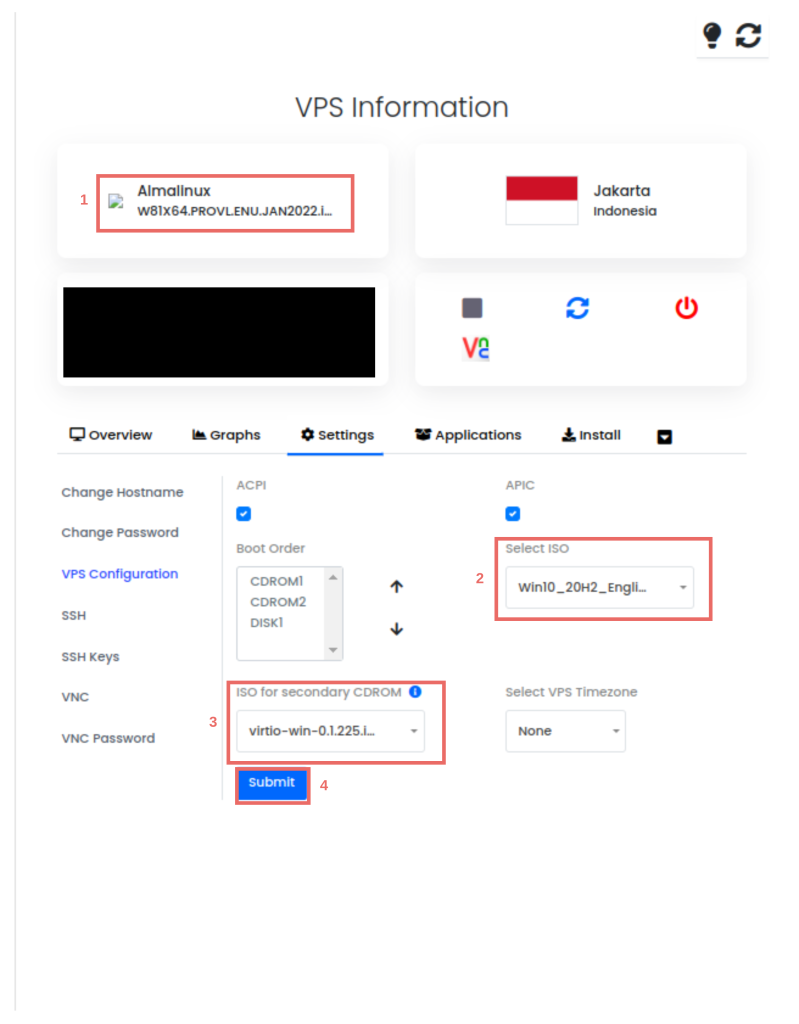
- Cek OS VPS Anda saat ini pada kotak nomor 1
- Tentukan ISO OS baru pada kotak nomor 2
- Pastikan Secondary ISO menggunakan virtio-win-xxx pada kotak nomor 3
- Jika Sudah Select ISO tekan tombol Submit pada kotak nomor 4
6. Masuk VNC VPS
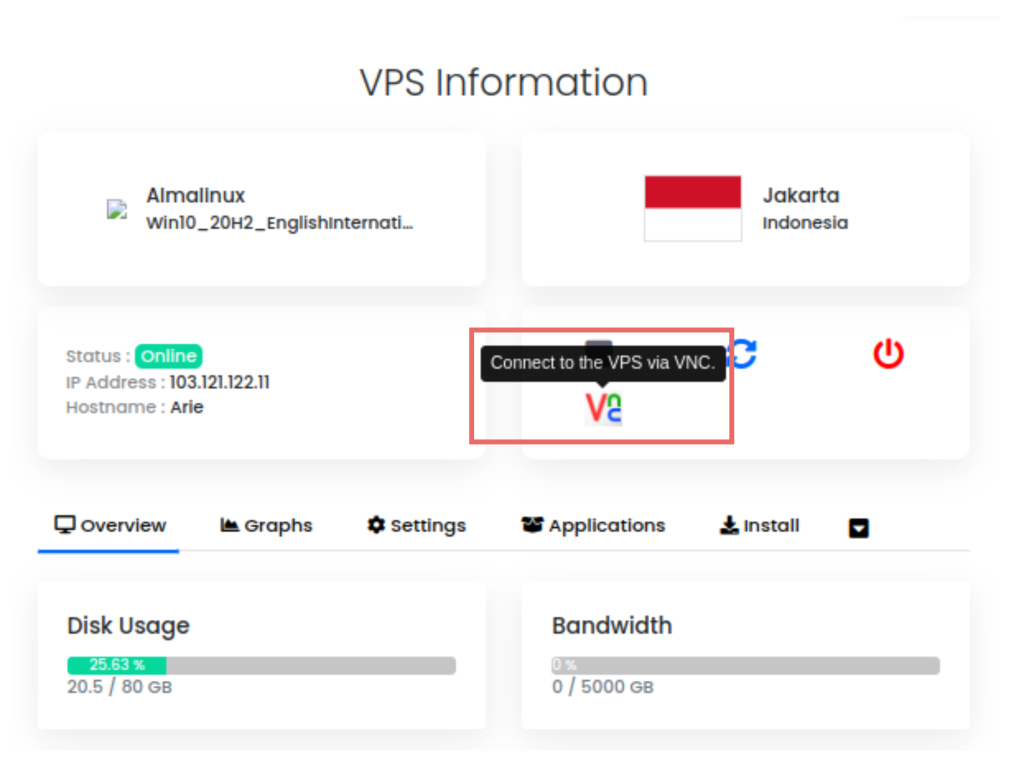
7. Pilih HTML 5 VNC Client

8. Jika Sudah Muncul Layar noVNC VPS, Reboot VPS

9. Setelah Reboot, Pastikan VPS Mount ke OS baru.
10. Spam ESC sebelum VPS Aktif, kemudian tekan angka 1 pada keyboard

11. Lanjutkan Proses Instalasi OS Baru

12. Pilih Install Now

13. Pilih Mode Custom Installation

14. Pilih Load Driver

15. Pilih OK

16. Jika Sudah muncul Red Hat VirtIO Seperti gambar dibawah, Pilih Next, Jika belum muncul Pilih Rescan. Apabila Setelah Rescan belum muncul, Kembali ke point 5 dan atur Secondary Iso menuju virtio-win-xxx

17. Jika Disk Partition sudah muncul, Delete Semua Disk

18. Berikut Hasil ketika Sudah menjadi 1 Disk

19. Pilih New kemudian Apply

20. Kemudian Delete System partition

21. Arahkan ke Primary Partition kemudian pilih Next

22. Tunggu Hingga Proses Instalasi Selesai

23. Pastikan Keyboard Layout menggunakan United States-International

24. Pilih I don’t Have Internet

25. Continue With Limited Setup

26. Jika Instalasi Sudah Selesai, Atur Username dan Password VPS


27. Tunggu Hingga Muncul Tampilan Dekstop Windows.
28. Jika Sudah Muncul Tampilan Dekstop

29. Pergi ke Device Manager

30. Fix Warning Issue Driver

31. Klik Kanan >> Update Driver

32. Pilih Browse my computer for driver

33. Rubah direktori menjadi E:\ kemudian Next

34. Pilih Close dan Ulangi untuk Driver Lainnya yang masih warning

35. Masuk ke Control Panel dan Allow Remote Access to Your Computer

36. Pilih Allow Remote Connections Kemudian OK

37. Done
Dengan mengikuti langkah diatas, anda dapat melakukan install Ulang OS Windows dengan mudah. Jika Anda ingin install ulang VPS Menggunakan OS Linux Bisa mengikuti Artikel ini.